Wednesday, November 7, 2012

Scones Glorious Scones


Being married to an Englishman has it's perks.  I have learned a lot about traditions in England and around the UK in general.  I have become a fan of UK treats as the sugar content is never as high as our baked goods over here.  There are some fabulous bakeries all over England and when we visit, getting freshly baked warm scones and smothering them in a bit of clotted cream and jam with a cup of tea or coffee is one of my favorite things to do.  That being said, scones over here are not the same.  Scones on this side of the pond are sweeter, come in all kinds of flavors and really are nothing like the English Scone.  In England, scones come in two, that is right two, flavors... plain and raisin.  They are just simple dense pillows of perfection.  No sugar coating, no berries, icing, no chocolate, pumpkin, maple or blueberry.  Just plain or raisin.  They don't need anything else.

They are simple to make and should be served warm.  In the USA if you can't get clotted cream, which you can in a lot of places, you can use mascarpone cheese.  Or you can just put a smear of butter and jam or just jam.  Serve with a cup of hot tea or coffee and sit back as if you had just stepped into a wonderful bubble bath.

Here is the recipe and method.  Now enjoy!

Prep/Total Time: 30 min.
Yield: 10 Servings
 

Ingredients
 

2 cups all-purpose flour

1/2 cup sugar

2 teaspoons baking powder

1/4 cup cold butter, cubed

pinch of salt

1/2 cup milk

1 egg

Additional milk

Directions

In a large bowl, combine the flour, sugar, salt and baking powder. Cut in butter until mixture resembles fine crumbs. Beat milk and egg; add to dry ingredients, stirring lightly.

Turn onto a lightly floured surface; roll to 1-in. thickness. Cut with a 2-1/2-in. biscuit cutter. Bake at 425° for 10-15 minutes or until golden brown. Serve warm. Yield: 10 scones.


Tuesday, September 11, 2012

Changing Family Spaghetti Night One Table at a Time

You already know my family loves pasta and that I can get bored real fast with the same old thing.  If my husband and kids had it their way, we would have something with a red sauce at least 3 times a week.  Pizza, pasta... ugh. 

I adore meatballs with spaghetti, but my family, I must shamefully admit do not like them, not one bit.  Unless they are Michael Symon's Greek Lamb Meatballs... then they can eat a double batch intended for our guests before those guests make it to our gathering.  So yes, I need options!  

One of the things I wanted to learn how to do was make a proper Bolognese.  You know a sauce with meat incorporated beautifully into some lovely pasta.  I just never enjoyed those who cooked up some ground beef and dumped it in the sauce, this was not good eats.  So one day I was watching Anne Burrell make her bolognese: it looked so good!  Ground beef, pureed veggies, tomato paste and about 1/2 a bottle of red wine.  I made a batch, it was delicious and I highly recommend this recipe which can be found here. I made it on more than one occasion and the hubster and I loved it.  BUT it takes a LONG LONG time, a little bit of work and lots of love to come out great.  Granted, a good sauce is worth the time, effort and love and I would still be making if my kids loved it.  However, with so much red wine in the sauce my kids kept asking for their favorite super market brand... parenting fail!

However, with inspiration from Anne Burrell and a little more from watching the likes of Mario Batalli and Michael Symon... I have perfected the perfect, easy and not so intensive and most importantly family friendly bolognese!  It will satisfy a sophisticated grown up pallet and your kids will be licking their plates too.  So enjoy!

This is also an easy recipe to can or freeze, so go on, grab the biggest pot you can find and make a double batch!  You will have left overs from this one, but if you are like our family, you will find yourself warming up the leftovers and dipping into it with a little bread during football games or putting on a hot dog or dressing up a burger or adding a few more spices and turning it into a last minute chili.  It's as versatile as your imagination.

Bolognese
1 large onion or 2 small diced
2 large carrots, small dice or shredded (your choice, but I prefer small dice)
2 ribs celery, small dice
4 cloves garlic, medium dice
Extra-virgin olive oil, for the pan
Kosher salt
3 pounds ground chuck, brisket or round or combination (I use round most often, but they all work great.)
2 1lb cans of your favorite tomato puree
1 1lb can of diced tomato
3 bay leaves
1 bunch thyme, tied in a bundle

1 Tbs. fresh oregano chopped
3 Tbs. fresh Basil chiffonade
1 pound spaghetti or favorite long noodle like linguini or Fettuccine
1/2 cup grated Parmigiano-Reggiano


In a large sauce pot over medium heat, coat pan with oil. Add the veggies one at a time starting with carrots, let them cook for a minute until they soften, then add celery.  Let that cook for a moment until celery is starting to soften and then add onion and continue to cook until onions are translucent and then add your garlic.  Once you have added the garlic, let the veggies cook until you start to see things browning... now burning... until all their good caramelized bits start sticking to the bottom of your pan.  Once that starts to happen, add your herbs and season liberally with salt.  Stir together for a moment and then start to add your meat. 
Let the meat brown and turn over and move around as needed.  Add another liberal sprinkling of salt.  This is the most consuming part of making this sauce but it really only takes about 20 minutes or so.  Once all your meat is browned and is starting to crumble, add your can of diced tomato.  
Stir for a moment to incorporate and let the tomatoes start to cook.  Then added your 2 cans of tomato puree.  Stir to fully incorporate into the meat and veggies and season with more salt (taste now but don't over salt as you are going to be reducing this sauce)
 Bring the sauce to a simmer, turn it down to low and walk away.  Let it slowly cook and simmer all day.  It should be reduced by just about half!  Taste at this time and season with more salt if needed.  Shut off sauce.

 I will put this sauce on at 10am most days and it makes the house smell awesome all day.  BUT you can put this on as little as 2 hours before dinner and get great results with flavor... you just have to simmer a little harder for the first hour (practically boil).  When the sauce is ready, it should be thick and meaty.  Not at all thin like a traditional spaghetti sauce.  It should seem like it is almost like lightly coated meat.  If it gets too thick you can add a little water but not much as you want this to coat your pasta not be poured over top.

When you are about 20 minutes from serving cook your pasta.  Cook it 1 minute less than the package calls for al-dente pasta and be sure to salt your water liberally.  Reserve about a cup of your pasta water.  Once drained put your pasta in the now empty pasta cooking pot and add a few big scoops of sauce to completely coat the pasta and a bit more... stir into pasta and cook for a few minutes together if it is too thick, add a bit of your pasta water.  Put your now prepared pasta on plates or terrines... sprinkle with your Parmigiano-Reggiano and if you want to get really fancy, add a sprig of fresh basil.  Now just sit back and enjoy!

Serve with a nice side salad and garlic toast! 


Thursday, August 2, 2012

Time for Recipes

Things have just been nuts the last few months.  I have taken loads of pictures, played with a thousand ideas and have just not had time to put them on my blog.  That being said, there are some exciting recipes getting ready to be posted, some of them just in time for the end of summer or early fall.  Fall is my favorite time for recipes, the hearty, warm, belly filling comfort of it all and the best of the seasons harvest just waiting to be enjoyed.

Here are some of the wonderful recipes you can look forward to:


Spaghetti Bolognese

Caprese Salad

Watermelon Salsa

Taco Salad

Cheesy Crispy Oven Roasted Zucchini and Tomato's

Roasted Brussels Sprouts (Love 'em - PROMISE)

and probably some more I have forgotten about!  So get ready... the feast is coming!


Tuesday, April 17, 2012

We Love Mushrooms

My husband and I love mushrooms anytime we can add them to a dish, find a new way to include them in a dish or make something new with them, we are intensely satisfied.  There is just something about perfectly cooked mushrooms of all varieties that makes us happy.  Whether they are grilled, stuffed, roasted, in a sauce, a part of a side dish, as the main dish they are just a joy to eat.  I know, I am starting to sound a little like the Bubba in Forest Gump when he goes on and on about shrimp, but for us, it is true.  Can't have enough mushrooms.  

My lovely husband, who is enjoying my culinary adventures wanted pasta for dinner... again!  I grow tired quickly of pasta or things with a red sauce.  I had just made a rocking bolognese sauce over the weekend, which is easy and delicious and will be posted as it will make you a rock star in the eyes of your family... but the last thing I wanted was more pasta.  However, if I could change it up, and not have such a tomato base (my families favorite way to eat pasta), then maybe I could be a rock star yet again.  

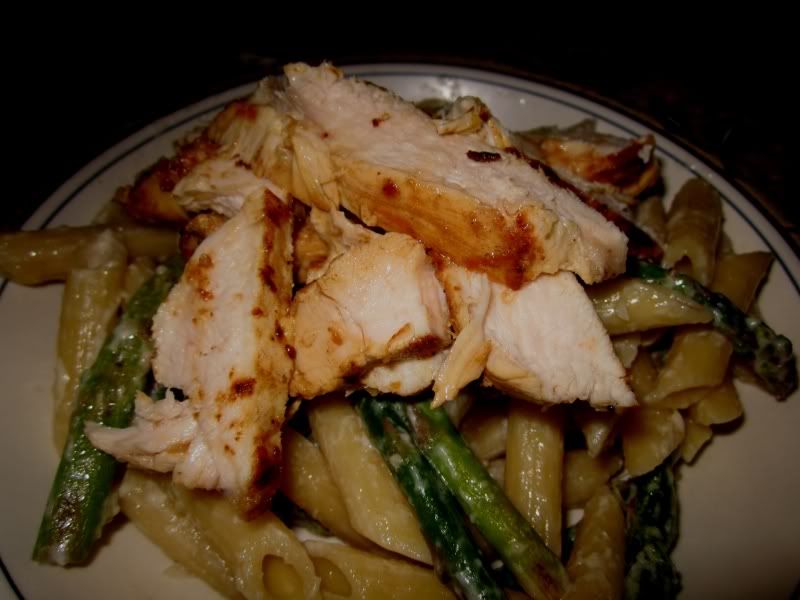
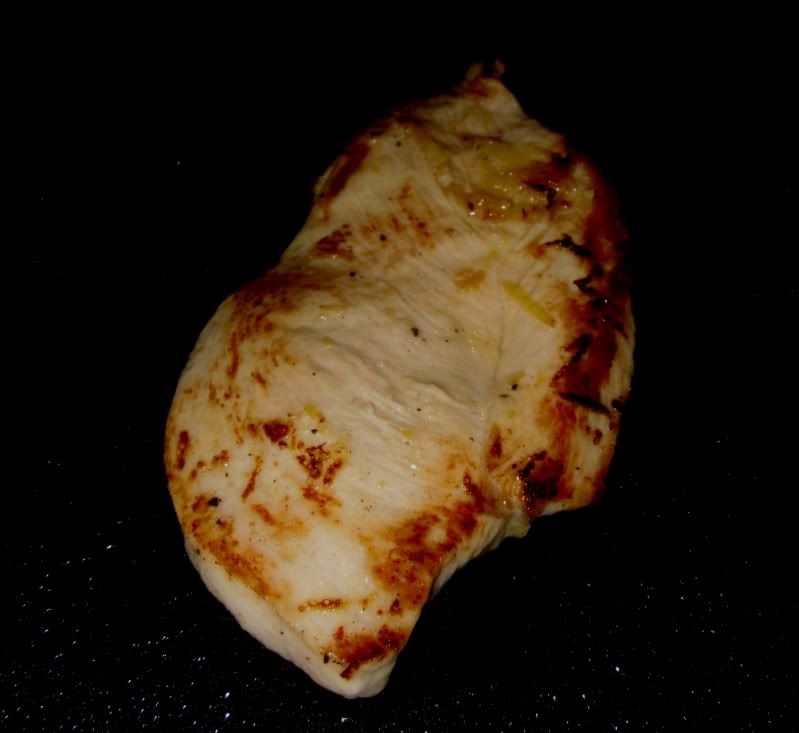
So here is what I made.  A lovely mushroom filled sauce, then added fettuccine noodles as this sauce deserved a bolder thicker and wider pasta.  Once the sauce was made, I realized it would go great over grilled pork chops and rice or angel hair pasta.  Great over chicken and rice with broccoli.  It could also go great over a steak to make an updated Steak Diane.  Now I don't often put sauce of any kind on my steak because if you cook the perfect steak it doesn't need anything else, however, if you are into sauce on your steak or are looking for an updated version of something like a Steak Diane then this is your sauce.  

It can be made vegetarian or not, mine was not, but it could have easily held up without the addition of  the Prosciutto Di Parma.  Personally, the addition of the Prosciutto was a plus for me, but it could be done without it for sure.  You could also add a nice crisp white wine instead of water to make it even more grown up, but my kids wouldn't have touched it with wine in the sauce.  It was plenty rich and delicious with out the wine, but 16oz's of wine instead of water, you have a special date nice sauce that works in many applications.  

I forgot to take pictures at the end, it was so good we just ate it.  This is when you know I am still an amateur at this food blogging thing.  I did take a picture or two as I was making it, so will share that, but you will have to wait until I make it again for a finished picture.  At this point I am still working on my food photography too which leaves something to be desired.  When you have a hungry brood waiting for their meal, well taking pictures is the last thing on my mind.  

Rockin' Mushroom Sauce

What you will need:

1 lb Crimini Mushrooms sliced thin
1 16oz can of diced tomato 
4 or 5 slices of Prosciutto
1/2 a medium red onion sliced very thin
2 big cloves of garlic sliced wafer thin
1 cup of water or crisp white wine (make sure it is a wine you like to drink)
3 Tbs fresh basil 
1 Tbs fresh oregano (if you don't have fresh herbs please cut herb measurements in half)
2 Bay Leaves
1/3 to 1/2 Cup of Cream
2 inch piece of parmigiano reggiano rind
salt
olive oil (not extra virgin)

Method:

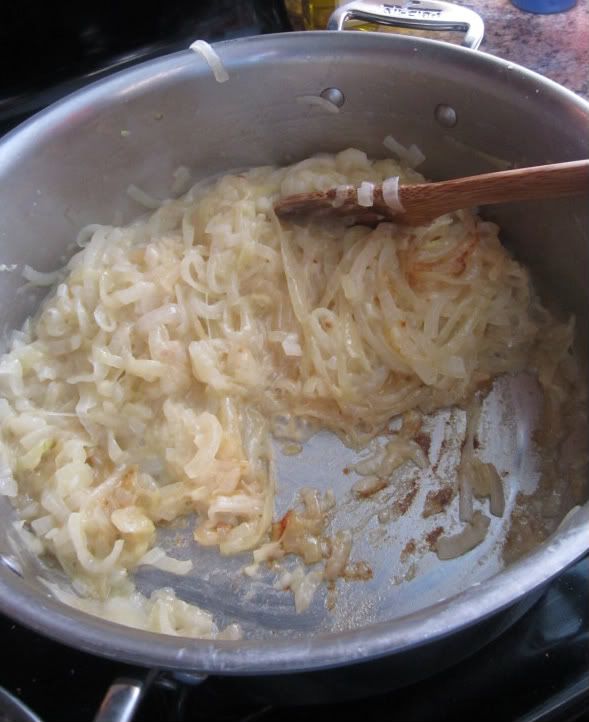
Using a mandolin or your awesome knife skills, slice onion, garlic and mushrooms wafer thin.  Cut the onion rings in half (these will all but disolve in the cooking process but it makes it easier this way).  In a large skillet, add a little olive oil for cooking, heat to medium and add onion.  Let onions sweat until translucent and then add garlic.  While onions are cooking, chiffonade your basil and chop your oregano.  Add basil, oregano and bay leaves to the pan and saute for moment.  Chiffonade your Prosciutto and add to pan.  Add a big pinch of salt (season as your go) and if your oil is gone add a bit more oil and toss in your mushrooms.  Let the mushrooms brown and then season again with a little salt.  Once mushrooms are nicely browned, add your tomato, including the juice.  Then fill the empty can with water or wine.  Add water or wine to pan.  Bring the sauce up to a simmer and let it reduce by 1/2.  

Once reduced by half, turn off your heat and let the sauce cool for a few minutes.  Once cooled slightly add your parmigiano reggiano rind and your cream.  Bring sauce back up to a simmer and reduce by half.  If you reduce too far add a little more cream.  Taste your sauce and adjust seasoning with salt. 

Once sauce is done, toss in your cooked al dente pasta while simmering and cook together for a minute or two so that the pasta absorbs some of the flavor of your sauce.  Remove any remaining parmigiano reggiano rind and your bay leaves.  Serve warm with a sprinkle of parmigiano reggiano on the top.  Or spoon sauce over your pork, steak or chicken.  Enjoy!

Thursday, March 29, 2012

Roasted Corn Salad

I love corn.  I love it when the local corn crops are ready and I can get a dozen ears of corn for $2 at the farmers market.  I wish I could have fresh, off the farm corn year round.  I like it boiled, grilled, roasted, on the cob, off the cob, in salads, as a side dish or I really could just eat it for a meal on it's own.  I can't wait to take a bite and have a kernel bust in my mouth.  Ahhh so simple and delicious.  This salad is wonderful if you fresh or frozen corn available to you.  It can bring a taste of summer to your table all year round.  It goes perfectly with fish, pork or chicken.  You can easily change it up and go a million directions if you want.

Here is what you will need:

For the Salad:

1 bag of frozen corn or 4 ears of fresh corn on the cob
1 pint of Cherry, Grape or Strawberry Tomatoes (your preference or whatever looks good).  Cut in half.
1/2 a Hot House or English  Cumber (peeled, seeded and cut in a medium dice)
2 scallions small cut on the bias, whites and greens
1/3 pint pitted Kalamata Olives cut in half
1 avocado diced
1 red jalapeno seeds and ribs removed and small dice (leave some ribs or seeds if you like it spicier)
1/2 of a Red, Yellow or Orange Bell Pepper Medium dice
3 tablespoons fresh Cilantro, fine chiffonade.
Nice hunk of feta cheese to crumble (I usually figure 1/4 pound or just under.  You can use more or less depending on your preference.
Salt & Pepper
zest of 1 lime and a squeeze of lime juice

For the Dressing (you will only need about 1/2 the dressing for the salad but I always put some on the table for those that want an extra drizzle and it will keep for about 2wks in the fridge so you can use it on another salad or make more corn salad):

1 lime juice and zest plus the remaining juice from the lime you used for the salad.
3 tablespoons of honey
2 garlic cloves
1/3 cup white wine vinegar
1 cup light olive oil (not extra virgin) or vegetable or Canola oil
3 tablespoons Fresh Cilantro Leaves (no stems)
1/2 teaspoon of salt


Directions:

Preheat your oven to 425 degrees.  Spread your corn out on a baking sheet.  If using fresh ears of corn you can roast on or off the cob (your preference) if you roast on the cob,  just allow time for the cobs to cool completely before you cut off the kernels and add to salad.  Put sheet tray in oven for about 15 to 20 mins.  Check as you go.  Corn should have nice browning when done.

While the corn is roasting.  Prep your other salad ingredients and toss in your large mixing bowl.  Once corn is done and cooled add to salad bowl.  Sprinkle with salt, add lime zest and a little squeeze of juice.  Mix gently, cover and refrigerate.  (This can be done up to a day in advance).  Do not add the Feta cheese, this should be added right before serving.

To make the dressing, toss all ingredients except for oil into your blender or food processor.  Pulse until all ingredients are pureed together.  Once pureed, slowly drizzle in the oil.  The dressing should become creamy.  Don't blend to much after creamy consistency is achieved or it will thicken too much and become more of an aioli. 

About 30 minutes before serving, drizzle about 1/2 or your dressing over the salad and mix together.  Add your crumbled feta and gently toss. 

Serve family style or plate with your main dish.

I promise this salad will be a hit and is extremely delicious.


Wednesday, March 28, 2012

The Chocoate Chip Cookie Dilema

No matter who you are, you have an opinion on chocolate chip cookies.  Almost everyone I know revels in a moist chewy with crispy edges kind of cookie.  Not my husband.  I love him dearly but the "American" chocolate chip cookie is not something he enjoys.  He likes his cookies "dunkable".  He likes them harder, dryer, crumbly... more like the store bought, dare I utter the words "Chips Ahoy".  I can not stand those cookies.  Not only are they full of junk, they don't taste nice.  So I have been on a mission to find a crispier, more crumbly but not flat, chocolate chip cookie recipe.  Still no such luck! 

Now, head with me in the "Way Back Machine" to my freshman year of college when I had a hypochondriac room-mate named Donna.  To this day I cannot for the life of me remember her last name, and yet I digress.  ANYWAY... Donna's Mom would send her care packages with the most amazing little home made chocolate chip cookies.  They were light little balls filled with chocolate chips, but what I would call dry, crumbly and well, crumb makers!  Delicious.  I have searched the internet high and low with no luck for something like Donna's Mom used to send to us.  So if you have a recipe that fits what I am describing, could you please send it to me????

So in my state of discontent, and because I don't like sickly sweet cookies, I am attempting a chocolate chip shortbread cookie bar recipe today.  We shall see.  The pan is in the oven baking right now.  One half has Easter Colored M&M's on top and the other half walnuts since I love walnuts in my chocolate chips and my kids do not.  I am not sure these will do it for my husband, but I am crossing my fingers. 

As for the recipe, I just made a basic shortbread recipe, added chocolate chips (a full bag of dark chocolate chips) and done.  I pressed it all out on my sheet tray and then chilled it on there before baking.  A lot easier to spread before chilling.  Added the M&M's and nuts on top before baking and pressed them down into the dough slightly.  I had to triple the shortbread recipe to fit my baking tray.  It's great really because if they are good, shortbread cookies freeze really well!  They sometimes taste better after freezing.

Here is my basic shortbread recipe:  P.S. the source on this recipe is from an old Joy of Baking or Betty Crocker cook book.  Had it in my recipe box for years.

SHORTBREAD:
3/4 cup (1 1/2 stick) (170 grams) unsalted butter, room temperature
1/4 cup (50 grams) granulated white sugar
1/2 teaspoon pure vanilla extract
1 1/2 cups (210 grams) all purpose flour
1/8 teaspoon salt
1/4 cup Chocolate Chips (I prefer dark chocolate but use what you love)

Preheat oven to 350 degrees F and place rack in center of oven.   Grease with butter (or use a cooking spray) a 9 x 9 inch (23 x 23 cm) pan.

Using a mixer, beat the butter and sugar until light and fluffy.  Beat in the vanilla extract.  Add the flour and salt and beat until the dough just comes together then add your chocolate chips if using.  Press onto the bottom of your greased pan and bake for about 20 minutes, or until pale golden in color.


Reminder:  I tripled this recipe for my sheet pan.  Otherwise as noted above, the recipe is suitable for a 9x9 square banking pan.

Enjoy!

Tuesday, March 20, 2012

Gyros at Home with out the Big Rotating Hunk O'Meat on a Stick

Yum Yum Yum... sometimes there is nothing better than a gyro.  This is not something I traditionally make at home, I would much rather head out and bring home a tasty and authentic gyro but where we currently live, no such love exists.  I was successfully able to make a homemade chicken gyro using a recipe from Annie's Eats (her recipe here) and it was really good.  Then my lovely husband reminded me that we could make real lamb gyros at home using the greek meatball recipe that I adapted from Michael Symon's cookbook.  Let me tell you, those meatballs are so good that you can eat them just as they are, but make them a little bigger and you have got the best gyro filling ever!  The good news is if you really don't like lamb, you could use ground beef or ground turkey.  It really is all about the flavor!  These little meatball gems are PACKED with flavor and if you are not careful they could disappear before your dinner is ready to be served.

Now, I have adapted the recipe for the meatballs from Michael Symon's recipe which can be found here.  It is also in his cookbook Live to Cook.  These on their own are absolutely delicious and you will see a few versions of his recipe floating around the internet.  Do make them on their own at some point, I promise you will adore them.  That being said, you will also enjoy them as they have been adapted to become a homemade gyro!  A little advanced planning is necessary for homemade gyros, especially if you are going to make your own tzatiki, so make so you read all the directions before starting this recipe.

Ingredients

For the Meatballs

1/4 cup grated onion
2 cloves grated garlic
2 slices of day-old bread
1 pound ground lamb (beef or chicken can also be used)
1 egg
1 teaspoon fresh cilantro
1/4 teaspoon ground coriander
1 teaspoon ground cumin
1/8 teaspoon ground cinnamon
Pinch nutmeg
Grated zest of 1 lemon
Juice of half the lemon
Salt and freshly ground black pepper 
Milk

16 oz. plain yogurt (not nonfat, if possible)
1/2 hothouse cucumber or 1 regular cucumber, peeled and seeded
2-3 cloves garlic, pressed through a garlic press (or finely minced)
1 tsp. white wine vinegar
Salt and pepper (to taste)
Squeeze of fresh lemon juice
Extra virgin olive oil

For the Gyro's
Pita bread of your choice (I like old world as it doesn't have the pocket)
1 diced tomato 
1/2 a thinly sliced onion

Directions for the Meatballs

Rip by hand or small dice your stale bread and cover with milk in a large bowl and let sit for at least 20 minutes to 1 hour.  Once it has soaked for at least 20 minutes,  squeeze the excess milk from the bread. Add the lamb, egg, garlic, onion cilantro, coriander, cumin, cinnamon, nutmeg, lemon zest, lemon juice, salt, and pepper. Mix by hand until smooth. Form into little meatballs, about 2 ounces each.  Let the meat rest for about 15 minutes after forming meatballs before cooking.  Use a grill pan or large non-stick skillet to cook.  I use a non-stick griddle.  You should not need any cooking oil for this method as lamb is rather fatty so it will render out enough oil.  Don't worry your meatballs will be lovely and moist due to the bread and egg in the mix. 


Directions for the Tzatiki

To make the tzatziki sauce, strain the yogurt using cheesecloth over a bowl. Let strain for several hours or overnight, if possible, to remove as much moisture as possible.

Shred the cucumber. Wrap in a towel a squeeze to remove as much water as possible. Mix together the strained yogurt, shredded cucumber, garlic, white wine vinegar, salt and pepper to taste, and lemon juice. Drizzle lightly with olive oil. Refrigerate for at least 30 minutes before serving to allow the flavors to meld.

Assembly:

3 to 4 meatballs per pita depending on your taste and the size of your pitas.  Add diced tomato, a little onion and a nice dollop of tzatiki... enjoy!

Thursday, March 15, 2012

Spring Time Pasta (Only 5 Ingredients)


 I love asparagus and am always looking for new ways to incorporate it into our meals.  With the spring weather here a bit early (love that)... I figured what better to serve than a lovely dinner with fresh spring asparagus!  That being said, I seem to be posting a bit of pasta today, but let me tell you this one is divine on a lovely spring evening!  It is grown up enough to be served at a dinner party, intimate dinner for two and yet whimsical enough your kids will love it too.

Ingredients:
1 lb boneless skinless chicken breasts
1 lb bundle of fresh asparagus
1 box Pene Pasta
1 8 oz container of Mascarpone Cheese (or make your own)
1 1/2 or 2 Lemons
Olive Oil
Salt
Pepper

Directions:

In a bowl big enough to hold all your chicken, add the zest of 1 lemon and the juice of 1/2 a lemon.  Add a big pinch of salt, a pinch of freshly ground black pepper and a big drizzle of olive oil.  Whisk together and drop in your chicken breasts.  Cover and refrigerate for at least 30 minutes but the longer the better.  I like doing it overnight or right after breakfast when everyone is out the door.   In a little prep bowl, zest your other lemon and reserve the zest.  In another bowl squeeze the juice of the lemon you just zested, add a nice pinch of salt and a light drizzle of olive oil and whisk together.  Snap the woody bottoms of your asparagus off, and then cut your asparagus into about 3 nice even size chunks, place cut asparagus into the bowl with lemon juice, salt and olive oil.  Toss to coat and set aside.  This you can also do way ahead if you like.  The longer it sits in that little marinade the better it will be. 

When you are ready to cook.  Get your pasta pot out and fill with water and add a nice big pinch of salt.  When the water is boiling, add your pasta.  Cook one minute less than the directions suggest.

Get out your grill pan or fire up your grill.  Grill your chicken, make sure you sear and brown it well.  I promise it is worth the effort to give it a nice brown crust.  Once your chicken is cooked through, remove from grill and set aside to rest.  
 Then grill your asparagus so it is al dente with some nice grill marks. 

Drain your pasta reserving some of your pasta water.  Return pasta pan to stove top and reduce heat to medium low.  Add Mascarpone cheese, add pasta and start to stir together while cheese melts.  Add a sprinkle of salt and a little cracked black pepper.  Sprinkle in about 1/2 of your reserved lemon zest and mix well.

If it seems a little dry, add a little of your reserved pasta water to loosen up a little.  Sauce should coat pasta nicely but not be saucy.  Reduce heat to low and add your asparagus and toss together.  Slice your chicken breasts and begin to plate.

Put your portion of pasta with asparagus on the plate.  Place sliced chicken on top, garnish with a little lemon zest and a sprig of parsley or mint if you want to be fancy!  BUT mostly, just enjoy!

Freezable, Shareable, Cheesy, Chicken, Broccoli Pasta Bake

There is something comforting about anything with a creamy cheesy sauce.  It makes us feel good after a long day, it fills your belly and your soul.  Short of macaroni and cheese, which is a all time favorite (check out my Best Macaroni and Cheese you will ever make post if you love mac & cheese), there are lots of easy cheesy dishes out there to satisfy that craving.  This dish is freezable (make ahead, freeze and bake when ready to use).  It is also completely sharable.  Great for pot luck dinners, giving as a gift to a friend or just for sharing.  Kids and the young at heart will gobble this up.  Plus it has some things that are good for you too.  It is not all fat and carbs!  :)

 In any event, this is a quick easy meal to make ahead and enjoy any time.  I promise your family will love it!


What you will need:

1 lb. Chicken tenders
1 bag extra wide egg noodles (also works well with penne, rigatoni, fussili, rotini, etc as they all hold together well so whatever you have that way)
1 head of broccoli
1/3 pound shredded/grated Romano cheese (can also use Parmesan or Asiago)
2/3 pound shredded Mozzarella (I bought a 16oz bag and used 2/3 of the bag)
2 cups of milk/cream/half&half depending on your taste
1tbs flour
Kosher Salt or Sea Salt for seasoning
Poultry seasoning (unsalted)
Garlic powder
Freshly ground black pepper

Let's get started:

Fill your pasta pot with water and season liberally with salt.  Turn on high to bring to a boil.  Meanwhile, lets get the chicken going.  I love chicken tenders for this as they stay nice and soft in this recipe.  Season both sides of your chicken tenders liberally with salt, a dusting of garlic powder, poultry season and some black pepper.  Cook your chicken tenders.  I prefer to cook mine on my grill pan so they get nice and brown on both sides.  To steal a bit of lingo from Anne Burrell, brown food is Mmmmm Mmmmm good! 

By now your pasta water should be boiling.  Throw in the whole bag or box.  (This is a large recipe, it will feed a family of 4 easily with left-overs).  Cook your pasta just a minute short of what the box says should be al dente.  This is going to bake in the oven later, so you don't want to over cook your pasta now. 

Once your chicken is cooked, set it aside to rest.  This is an important step, otherwise once the whole thing goes in the oven you will have dry chicken.

Drain your pasta once cooked but reserve some of your pasta water.  Maybe a cup... you may or may not need it or want it but reserve just in case.

While your pasta is draining, return your empty pot to the stove.  Add your milk/cream to the pot and turn your burner to medium.  Let your milk/cream start to get warm (do NOT simmer or boil).  Place your shredded cheese in a bowl and dust with your tablespoon of flour... mix well.  It just saves you from making a light rue.  Trust me this makes your sauce making super easy.  A little trick I learned from Martha Stewart back in the early 90's when I actually found her interesting.  Slowly stir in your cheese flour mixture.  Turn your heat down to low and cut your broccoli into bite size florets. 
Toss broccoli florets into the sauce.  Note, do not precook your otherwise it will turn to mush.  The warm sauce mixture will slowly cook the broccoli and the baking later will make it perfect.  Then stir in your pasta.  Then cut up your cooked chicken into bite size pieces and mix into your sauce.  Make sure everything is coated in sauce and it should still seem a little saucy.  If it doesn't seem too saucy, add a little reserved pasta water or a little chicken stock.  Remember you are going to bake this in the oven like a cassarole or at the very least reheat and the slightly under cooked pasta is going to absorb quite a bit of sauce. 

Get out a baking dish at least 9x12, coat with a little olive oil to prevent sticking.  I just use an olive oil spray.  Then pour your mixture of deliciousness into your baking dish.  Sprinkle your shredded mozzarella cheese over top and you are done.

Bake covered at 400 degrees farenheit until warm through out.  Should only take about 15 minutes.  Uncover and bake until cheese is bubbly and has those lovely brown spots.  I don't have any pictures of the one I made today as I took it to a friend who really could use a home cooked meal, but I guarantee she will love it. 

Tuesday, March 13, 2012

French Onion Soup

So simple and delicious.  I have been making French Onion Soup for years, well at least 12 years anyway.  I have tried all sorts of methods and adding different things from a zillion different herbs to red wine and so on.  What I have discovered, is the most coveted bowl of French Onion Soup is the most simple recipe.  I have now been making this very recipe for 5 years and not one complaint, and it is the go to soup that everyone requests when they visit.  My Sister in Law and my Mum in Law love to have this waiting for them after a long flight.  Even my kids love it.  Really, what is not to love.  A bowl of hot soup with caramelized onions cooked in a steamy hot beef stock with a tasty crusty crouton and melted cheese.  I dare any of you to say you don't pick all the cheese off that has melted down the side of your bowl.  

All that being said.  Forget all the long crazy methods, forget all the herbs and wine... just forget you saw those recipes.  This soup is perfect just as it is.  When you use great ingredients that can stand on their own, they don't need any help.

Here is the recipe!

French Onion Soup

Ingredients:
4 Tbs of Butter (unsalted)
A few tablespoons of olive oil or vegetable oil (your preference)
4 to 6 medium to large onions.  I use a mix of spanish/white/and sweet (Valida or Mayan)
1 quart chicken stock (stock not broth)
1 quart beef stock 
Salt
Pepper
Croutons (recipe follows)
Gruyere, Swiss, or provolone cheese (your choice)


In a large stock or soup pot, melt butter and oil together to coat bottom of pot.  Melt on a medium low heat.  The oil will keep the butter from burning.  Using a mandolin or thinly slice by hand your onions so you get lots of nice rings!  Start adding the onions as you slice to your pot and stir as you go.  Once all the onions are in put in a giant pinch of salt. 


Turn heat up to medium and let the onions slowly caramelize.  You want to have a nice light caramelization... not a super dark one as you don't want your onions to taste like something you would put over ice cream! 

 
Once lightly caramelized add your stock.  

 Bring it up to a simmer and let it go until reduced by half.  

Add salt and pepper to taste.  If you over reduce, add a little water.

Put the soup in your soup crocks, add your crouton and put your cheese on top.  I often use a mix of swiss and provolone.  Put under the broiler until all bubbly and melted and little brown spots form.  Remove from broiler carefully, serve and enjoy.


Croutons:
I use a nice italian or french loaf, brush with olive oil, sprinkle with a little course kosher or sea salt and a pinch of garlic powder dusted all over and put in the broiler.  Let it get lightly toasted and flip and let other side toast.  Let the toast stand for a few minutes before putting on top of the soup.  I often make the croutons early in the day or a few hours before so they get super hard and will keep some texture in the soup.


That is it folks.  Make and enjoy.  Delicious home made french onion soup, can be made in as little as 2 hours but I usually like to give it 4 hours for maximum flavor.  

Bon Appetite! 


Not Too Sweet Frosting

My son Michael loves cupcakes.  Particularly yellow cupcakes.  He loves chocolate cake but not so much in cupcake form.  BUT in our house, we all have a problem with frosting.  I along with my husband and children don't like it too sweet, but we like it fluffy and delicious.  Short of whipped cream which needs to be refrigerated (don't like cold cake) I wanted to find something new... no more butter cream or 7-minute or well, any of that  sickly sweet stuff.  After a successful google search I found a frosting called interestingly enough, "Not Too Sweet Frosting".  When I read the recipe I cringed.  It can't be right.  Milk and flour whisked together on the stove top until thick, 1 cup of softened butter, 1 cup of granulated sugar, some vanilla and if you want chocolate, add 1/4 cup of cocoa powder.  Trick is you have to let that milk and flour mixture cool completely and when you beat it all together.... well all I can say is YUM!  Not too sweet, tastes close to a slightly sweetened whipped cream but holds together better. 

Right now my Mum in law likes it as much as I do, considering she is not much of a fan of "American Frosting".  The real test will be when Michael gets home from school in about 15 minutes. 

Here is the recipe:

INGREDIENTS:

1 cup butter or margarine
1 cup granulated sugar
1 cup milk
6 tablespoons flour
1 teaspoon vanilla extract
1 1/2 tablespoon cocoa if you want chocolate icing

DIRECTIONS:

Cook milk and flour until very thick (so thick you can't stir), COOL.

Cream butter, sugar and cocoa (if using cocoa) until very creamy Add milk and flour mixture and vanilla. Beat until thick and creamy (about 4 or 5 minutes).

Yields: 3.5 Cups

NUTRITION:

49 calories, 3 grams fat, 5 grams carbohydrates, 0 grams protein per tablespoon. This recipe is low in sodium.

I did not alter the recipe and this same recipe can be found here on CDKitchen.com.

BUT I did take pictures and there we no pictures on CD Kitchens site just great reviews.